
8 AI Image Effects You Can Apply to Any Photo
Transform your photo into eight distinct AI looks, from CCTV and Dreamcore to X-Ray and Ink Wash, with reusable prompts for each style.

A good image effect should change the visual language without losing the picture underneath it. The subject can stay in the same pose, the composition can stay fixed, and the scene can still feel completely different once texture, colour, contrast and image-making logic are replaced.
The eight styles below all work from that idea. Some behave like graphic treatments, some imitate imaging technology, and some rebuild the frame through a completely different medium. The useful test is whether the effect changes the image without making the original subject disappear inside it.
How to run these
Start from your original image every time rather than feeding one effect into the next. Each style should be judged against the same source, otherwise colour shifts, lost detail and structural changes begin to accumulate and it becomes difficult to tell what the effect itself is doing.
Acid Graphics
 [Before][After]
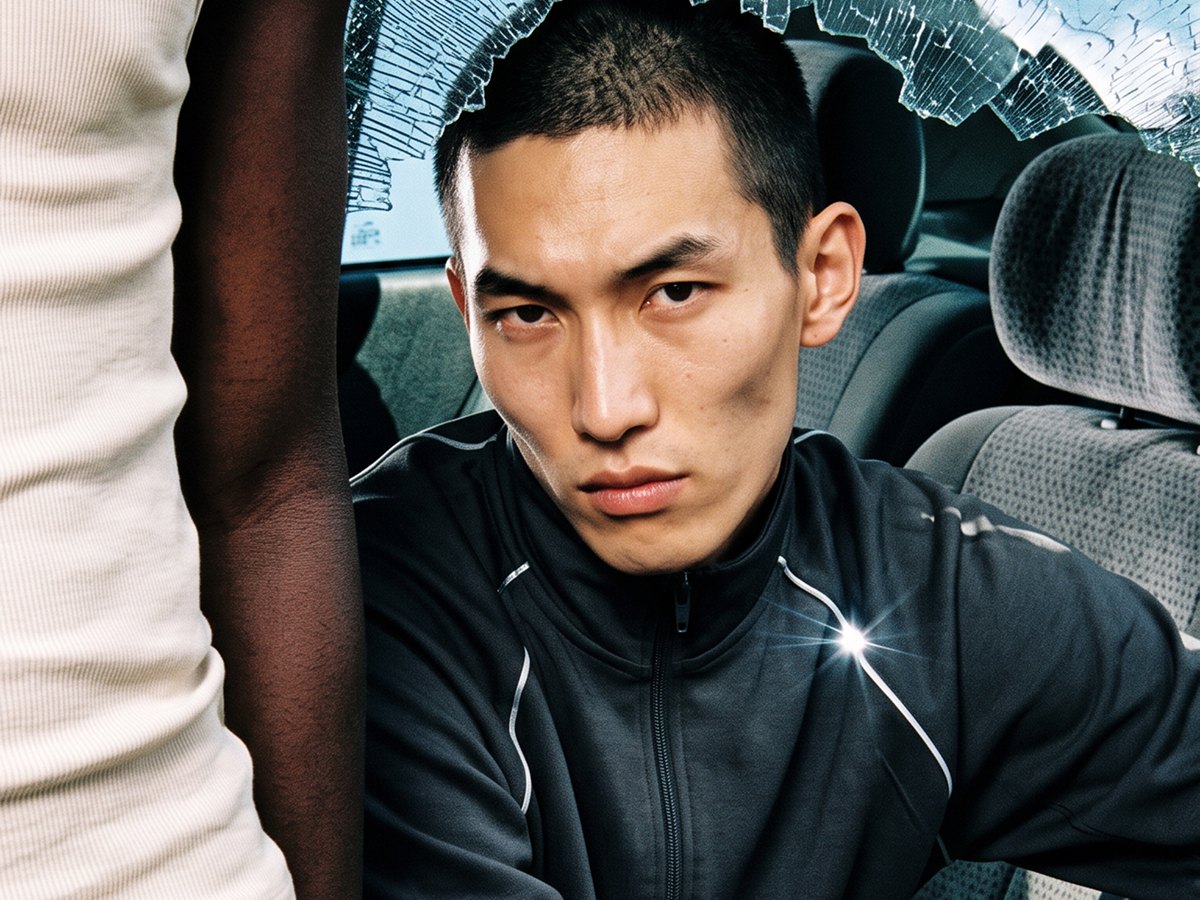
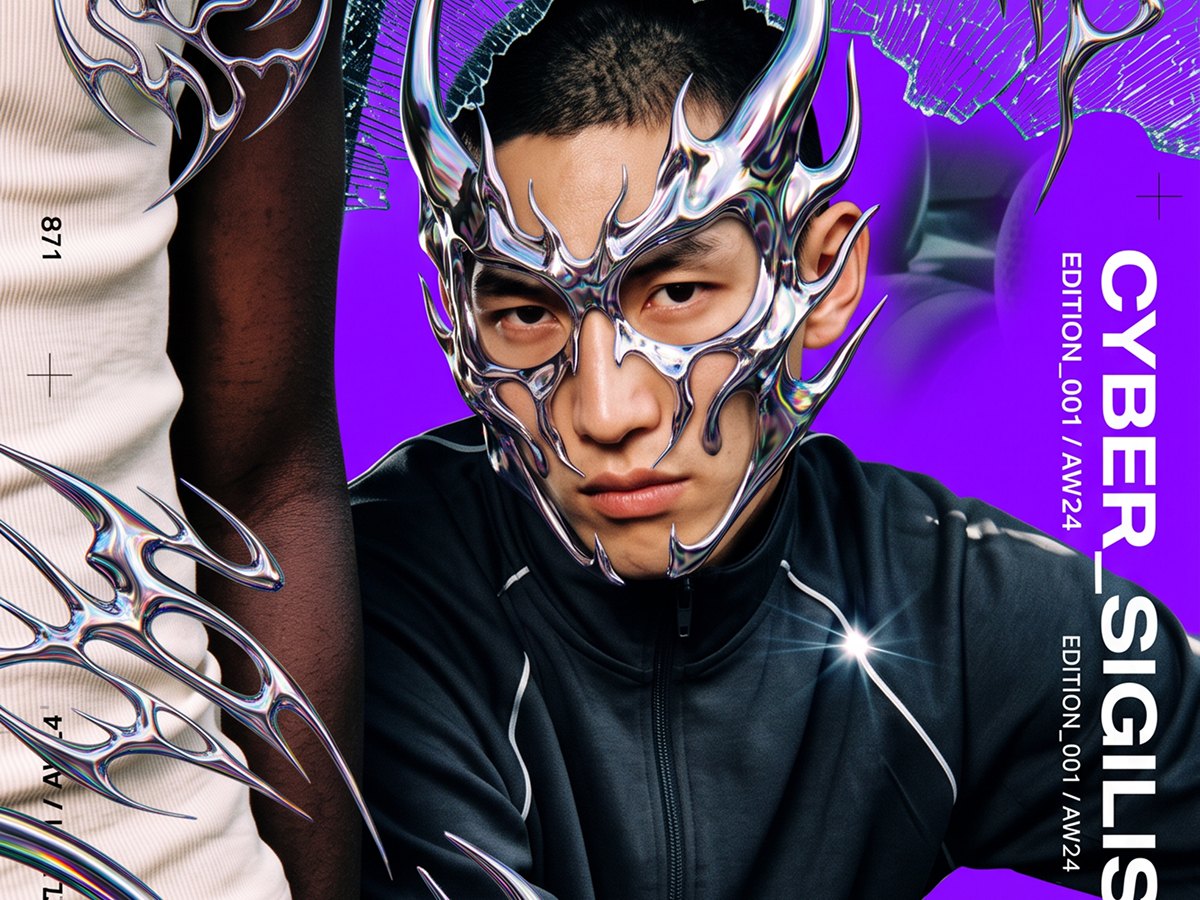
Acid Graphics works by treating the photograph as material for a poster rather than as a finished image. Chrome forms, distorted typography, sharp graphic fragments and saturated colour can sit over the frame, but the strongest versions still let the original subject anchor the composition. The effect works best when the graphic layer feels designed around the image rather than simply placed on top of it.
Transform @Image1 into a premium Acid Graphics editorial portrait. Preserve the person’s exact identity, facial structure, hairstyle, skin texture, expression, clothing silhouette, camera angle, pose, and composition. Keep the result fully photorealistic and fashion-editorial, never illustrated, painted, cartoonish, or CGI.

Create a high-end anti-design visual language inspired by Y2K cyber aesthetics, luxury streetwear campaigns, chrome futurism, and cyber sigilism. Wrap the face with an intricate liquid chrome biomechanical mask: mirror-polished, iridescent, partially melted, organically flowing around the eyes, nose, cheeks, and jaw while leaving enough skin visible for the identity to stay instantly recognizable. Include sharp organic spikes, elongated horn-like forms, thorn details, stretched metallic membranes, and dripping liquid-metal transitions that feel grown rather than manufactured.

Add floating chrome sigil ornaments across the frame, some overlapping the portrait and others sitting in the foreground and background to create layered depth. Every chrome element should have realistic reflections, rainbow iridescence, smooth metallic highlights, and physically believable lighting.

Replace the background with a perfectly flat ultra-saturated neon color, choosing one bold tone only: acid green, electric lime, vivid magenta, toxic orange, cobalt blue, or hyper violet. No gradients, no texture.

Add asymmetrical experimental editorial typography and subtle graphic overlays: bold sans-serif text fragments, vertical text, cropped oversized letters, rotated labels, repeated micro text, small captions, floating numbers, abstract branding, registration marks, tiny crosses, crop marks, barcode-like details, micro symbols, and minimal UI elements. Keep the layout premium, clean, and uncluttered.

Apply glossy contrast, rich blacks, vibrant color, subtle chromatic aberration, slight RGB edge separation, and sharp digital clarity while preserving realistic pores, accurate shadows, and premium photographic lighting. The final image should feel like a luxury underground fashion campaign, avant-garde magazine cover, or experimental album artwork with ultra-real portrait realism and elevated Acid Graphics styling.
Thermal Imaging
 [Before][After]
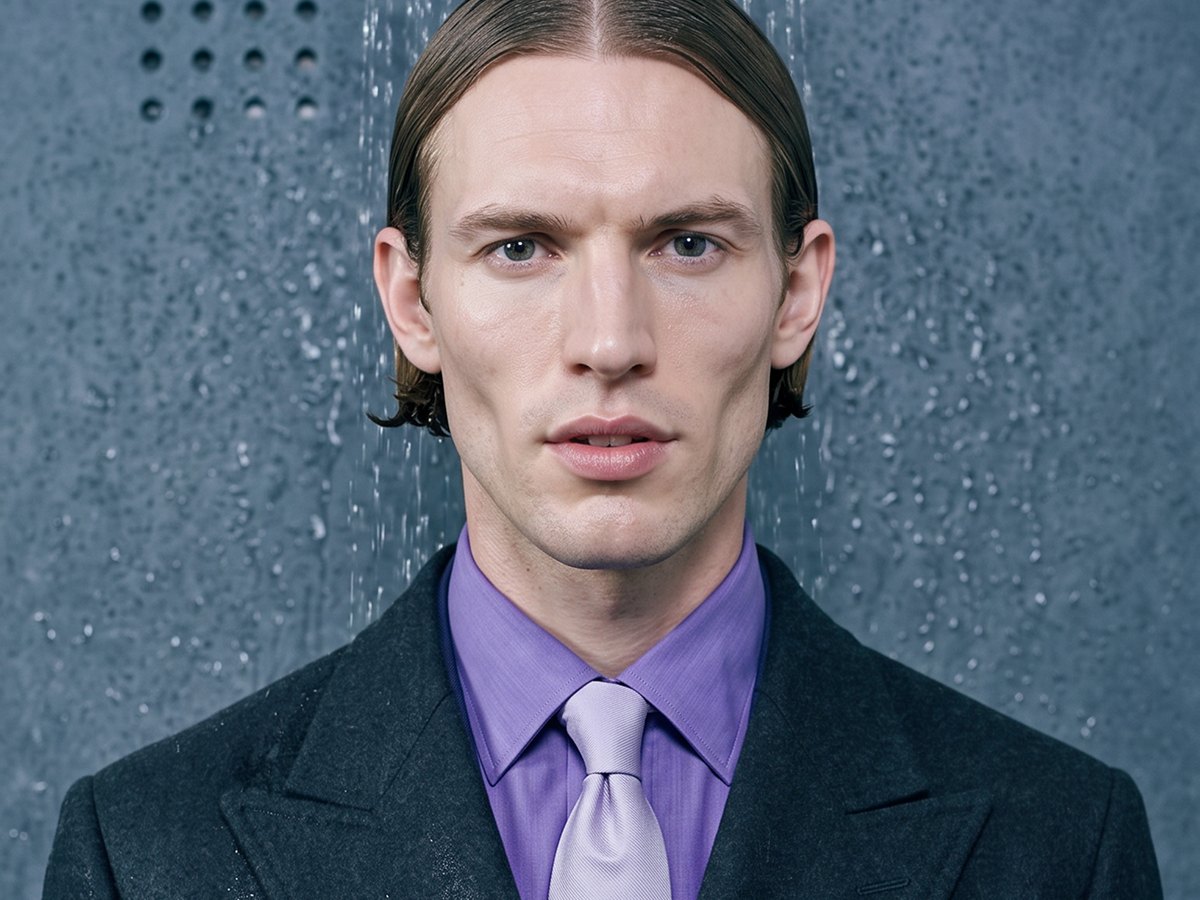
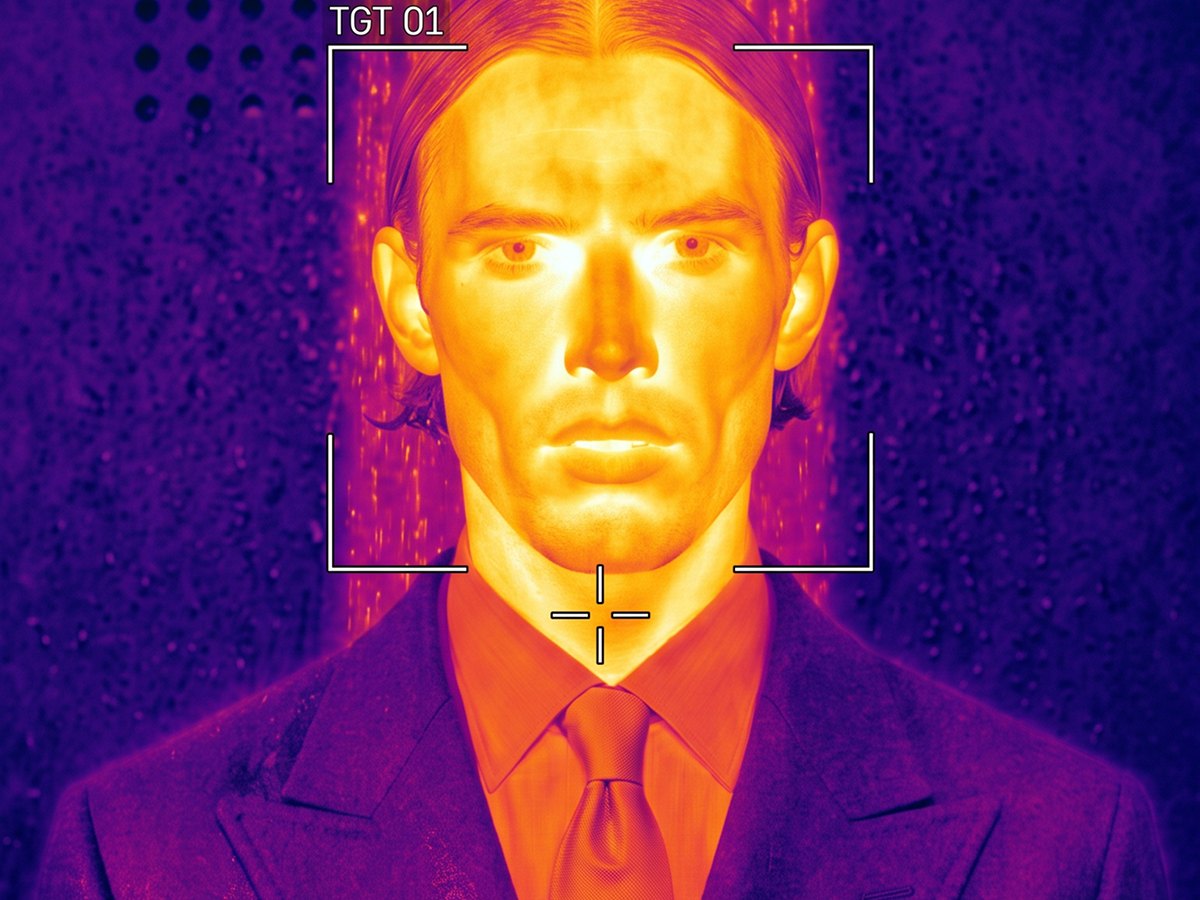
Thermal imaging replaces normal colour with a temperature map. Warm areas push toward yellow, orange and white while cooler parts of the frame fall through red, purple and blue, which means the visual hierarchy is no longer based on skin tone, wardrobe or material colour. The effect becomes much more convincing when the interface elements stay secondary and the heat distribution follows the subject’s actual form.
Transform @Image1 into an authentic FLIR thermal imaging scene. Preserve the person’s exact identity, pose, expression, body proportions, clothing silhouette, and camera composition.

Convert the full image into a realistic long-wave infrared thermal view using an authentic FLIR false-color palette: hottest areas in white, yellow, and orange, transitioning through red into purple, dark blue, and black for cooler surfaces. Heat distribution must follow believable thermal physics, not simple recoloring.

Render the scene as if captured by a professional military thermal surveillance system. All visible people, objects, buildings, vegetation, vehicles, and background elements should display convincing infrared signatures based on material, temperature, distance, and environmental exposure.

Overlay an authentic tactical FLIR HUD integrated into the feed, including target tracking boxes on detected people, Celsius temperature readouts, object IDs, FLIR system data, compass heading, altitude, latitude and longitude, zoom level, battery, timestamp, range finder, distance markers, pitch and roll scales, crosshair, tracking status, telemetry, diagnostics, signal indicators, and thermal mode labels such as WHITE HOT or IR MODE. Keep the interface technical, thin, precise, and fully embedded into the imaging system.

Add subtle sensor realism: thermal bloom around hot areas, infrared noise, detector grain, slight edge diffusion, signal interference, optical vignetting, and realistic sensor softness while keeping the image highly readable.

Maintain strong realism, accurate anatomy, believable thermal behavior, and clear environmental separation. The result should feel like genuine footage from a high-end FLIR reconnaissance or drone surveillance system, not a stylized color filter.
X-Ray
 [Before][After]
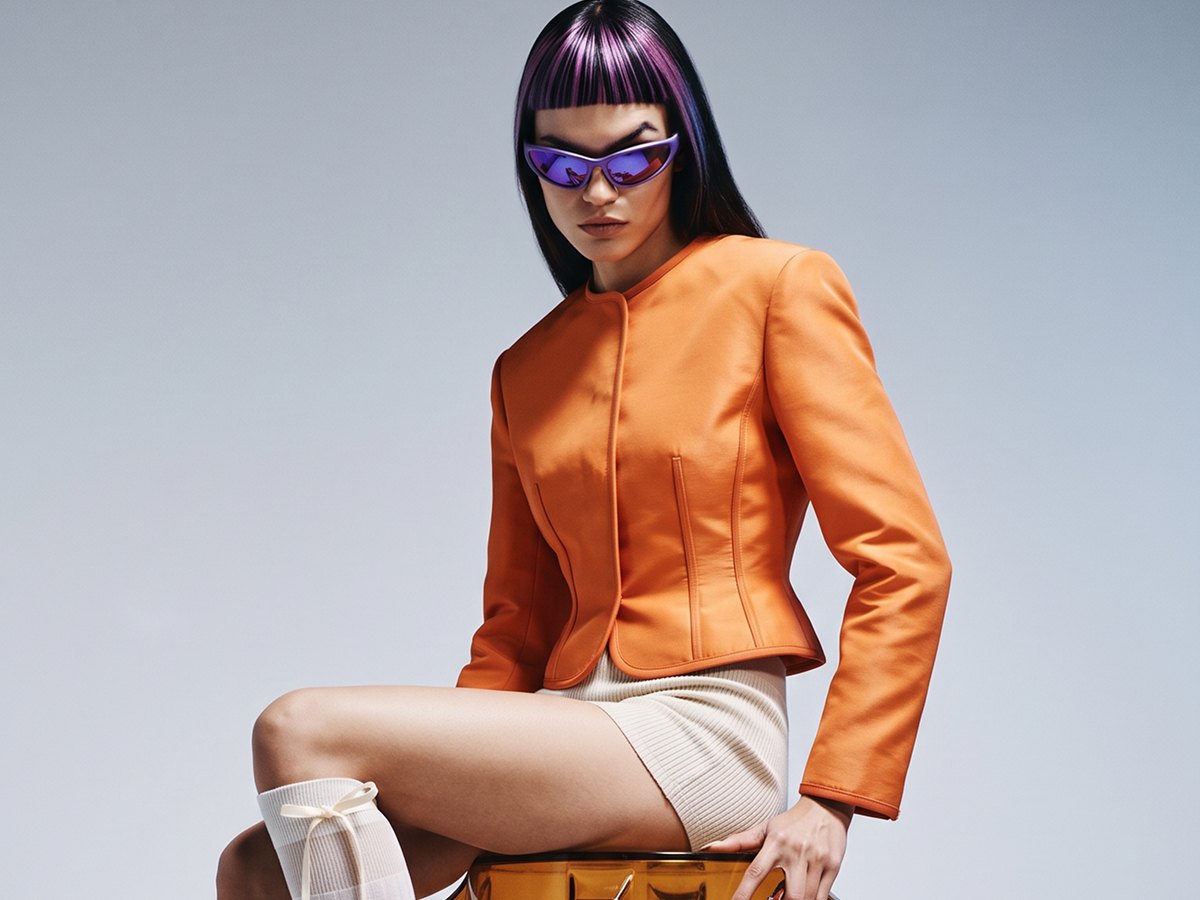
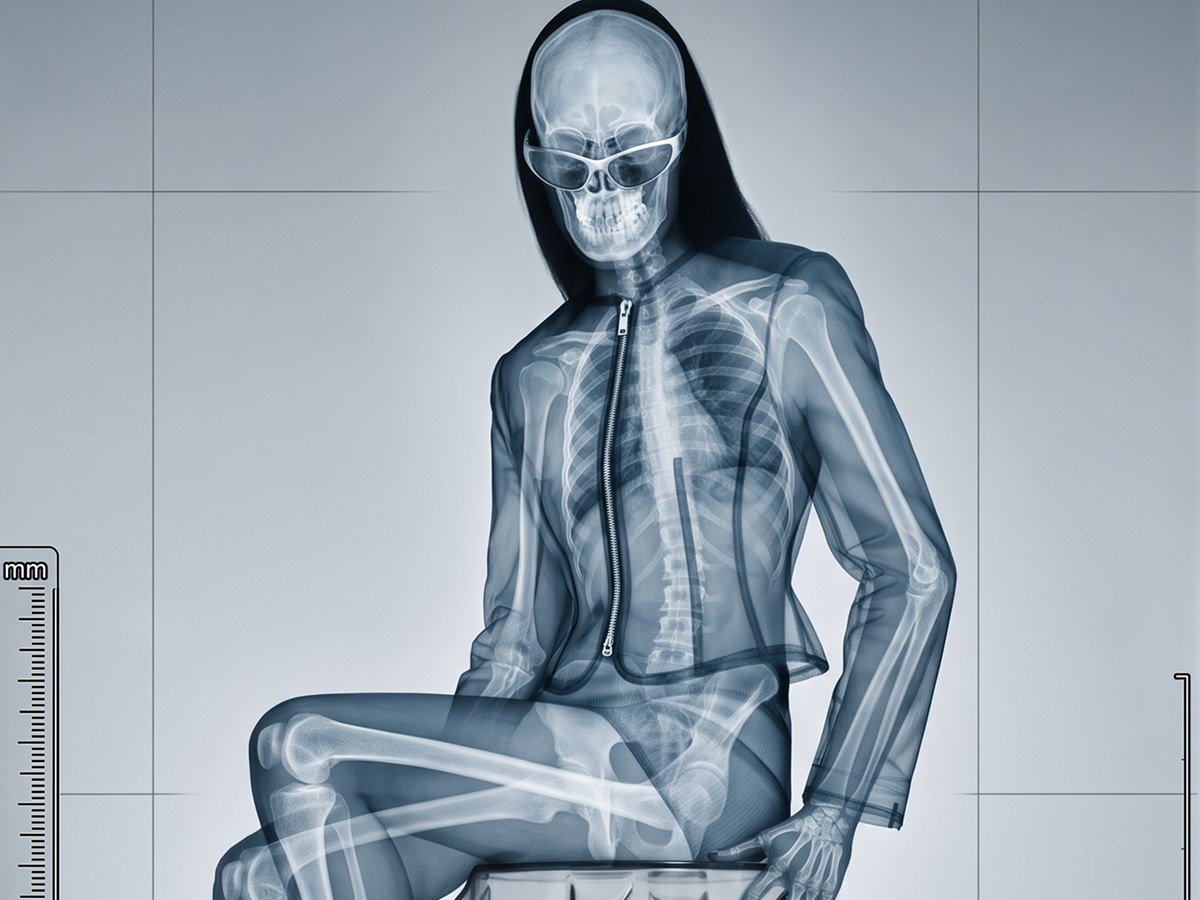
X-Ray is less about turning the image monochrome and more about changing what the camera appears able to see. Surface colour drops away, solid forms become translucent, and internal structure begins to replace the exterior as the main source of detail. The difficult part is keeping the pose, clothing silhouette and surrounding objects readable enough that the transformed frame still matches the source.
Transform @Image1 into an authentic digital X-ray radiograph. Preserve the person’s identity, pose, expression, body proportions, clothing silhouette, camera framing, and overall composition.

Render the full scene as if captured by a modern hospital digital radiography system, using realistic X-ray attenuation based on material density rather than a simple monochrome filter.

Reveal anatomically accurate skeletal structures only where physically visible from the original pose, including the skull, jaw, teeth, cervical spine, clavicles, rib cage, shoulders, arms, and hands. Keep proportions medically believable and aligned precisely with the subject’s anatomy.

Render bones in bright diagnostic white with subtle internal density variation, teeth slightly brighter, and soft tissue as semi-translucent blue-gray. Hair should become faint and partially transparent. Clothing remains visible as a translucent silhouette with preserved folds, while dense metallic elements such as jewelry, eyeglasses, zippers, watches, buttons, and piercings appear intensely bright from strong X-ray absorption.

Keep furniture, architecture, and surrounding objects visible through believable radiographic density differences rather than removing the environment.

Overlay a restrained hospital DICOM interface with patient/study metadata, R/L orientation markers, calibration rulers, kVp and mAs exposure data, acquisition date and time, measurement guides, positioning markers, image number, detector information, and subtle medical annotations. Keep all interface elements clean, technical, and integrated into the imaging system.

Add realistic detector grain, slight phosphor bloom, smooth tonal transitions, crisp bone detail, and premium diagnostic image quality.

Maintain scientific realism and accurate anatomy. Avoid cartoon skeletons, glowing bones, horror styling, fantasy effects, or exaggerated translucency. The result should feel like a genuine hospital digital X-ray capture, not a stylized filter.
Vaporwave
 [Before][After]
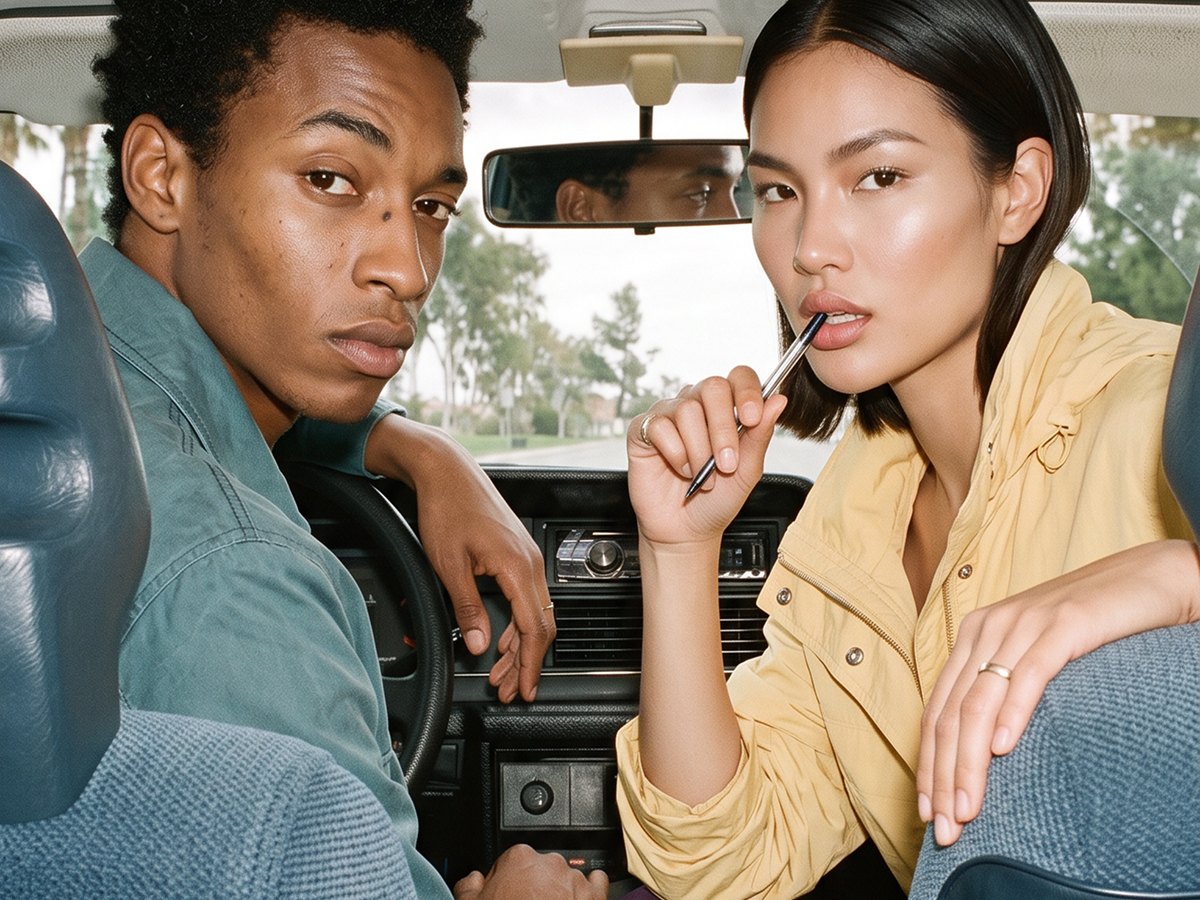
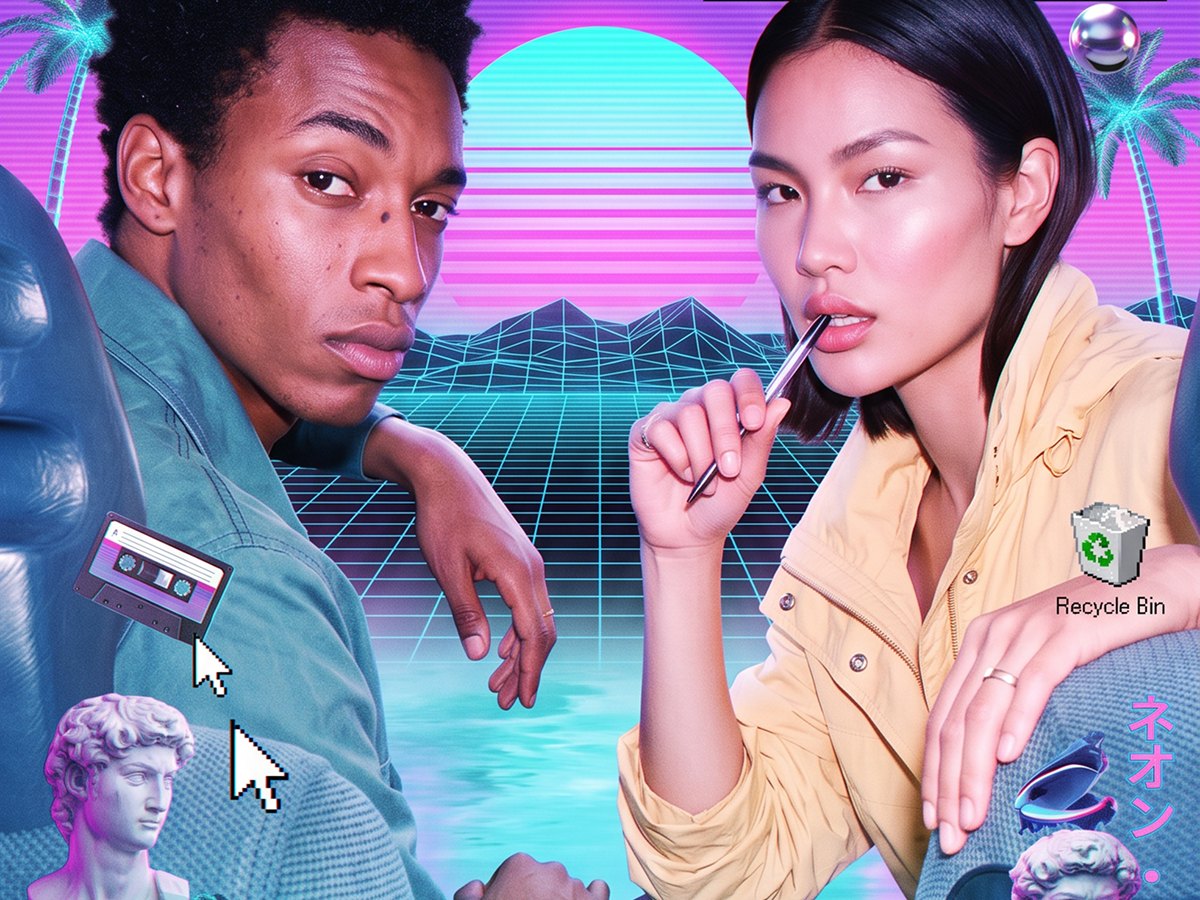
Vaporwave does not need much restraint, but it still needs hierarchy. Old computer windows, neon gradients, grids, classical sculpture, synthetic skies and late-eighties or nineties interface graphics can all belong in the same image, provided the subject remains the thing the composition is built around. Without that hierarchy the frame becomes a collage of references rather than one coherent world.
Transform @Image1 into an authentic Vaporwave editorial while preserving the subject’s exact identity, pose, expression, clothing, and composition. Keep the subject fully recognizable with realistic skin, natural facial detail, believable shadows, and photographic lighting.

Reimagine the scene in iconic Vaporwave visual language inspired by late-80s and 90s digital culture, retro desktop UI, early internet aesthetics, Japanese city-pop nostalgia, and surreal consumer futurism.

Replace the environment with a retro-futurist dreamscape: a glowing striped neon sunset, purple sky, cyan fog, reflective water, a black perspective grid fading into the horizon, wireframe mountains, and floating chrome spheres.

Surround the subject with floating retro computer interface elements: desktop windows, dialog boxes, error messages, file explorer panels, browser-style windows, toolbars, loading bars, mouse cursors, desktop icons, floppy disk symbols, folders, recycle-bin-style icons, and other period-inspired UI fragments. Let them float naturally in layered depth with subtle transparency and perspective.

Integrate classic Vaporwave objects throughout the scene: marble busts, Roman columns, palm trees, translucent acrylic forms, holographic glass, floating CDs, VHS tapes, cassette tapes, CRT monitors, and retro computer hardware.

Use a vivid palette of neon pink, magenta, cyan, turquoise, lavender, electric blue, and purple with soft atmospheric glow. Add authentic analog-digital texture: VHS grain, CRT scanlines, chromatic aberration, RGB separation, tape noise, subtle compression artifacts, pixelation, bloom, lens flare, and soft glow.

Include retro-futurist typography and graphic fragments such as Japanese katakana, software-style labels, pixel icons, geometric symbols, and minimalist corporate graphics. Use fictional era-inspired text only, not real trademarks.

Build clear layered depth with interface windows in the foreground, the subject in the midground, and the Vaporwave landscape in the distance. The final image should feel like a premium editorial fashion image merged with a surreal nostalgic digital world: ultra-realistic, cinematic, polished, and unmistakably Vaporwave.
Dreamcore
 [Before][After]
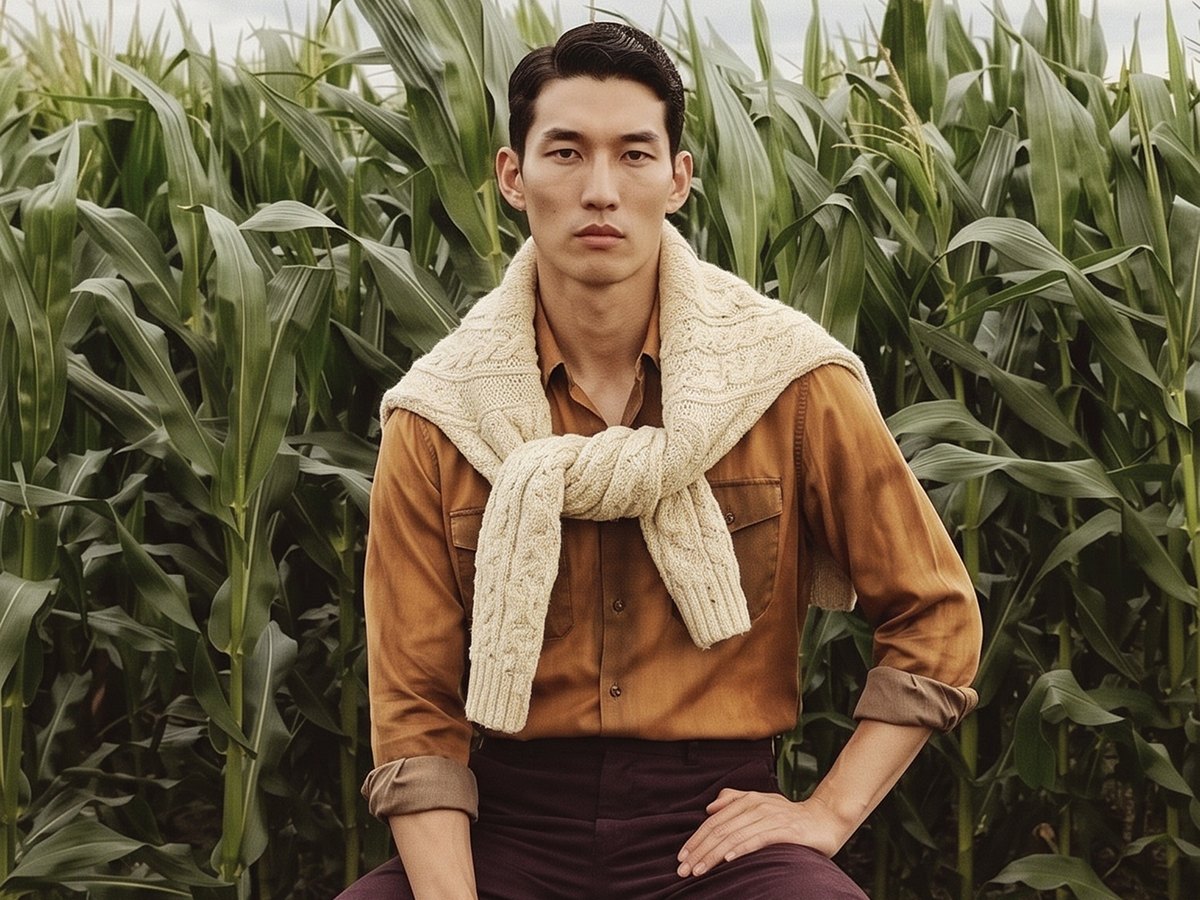
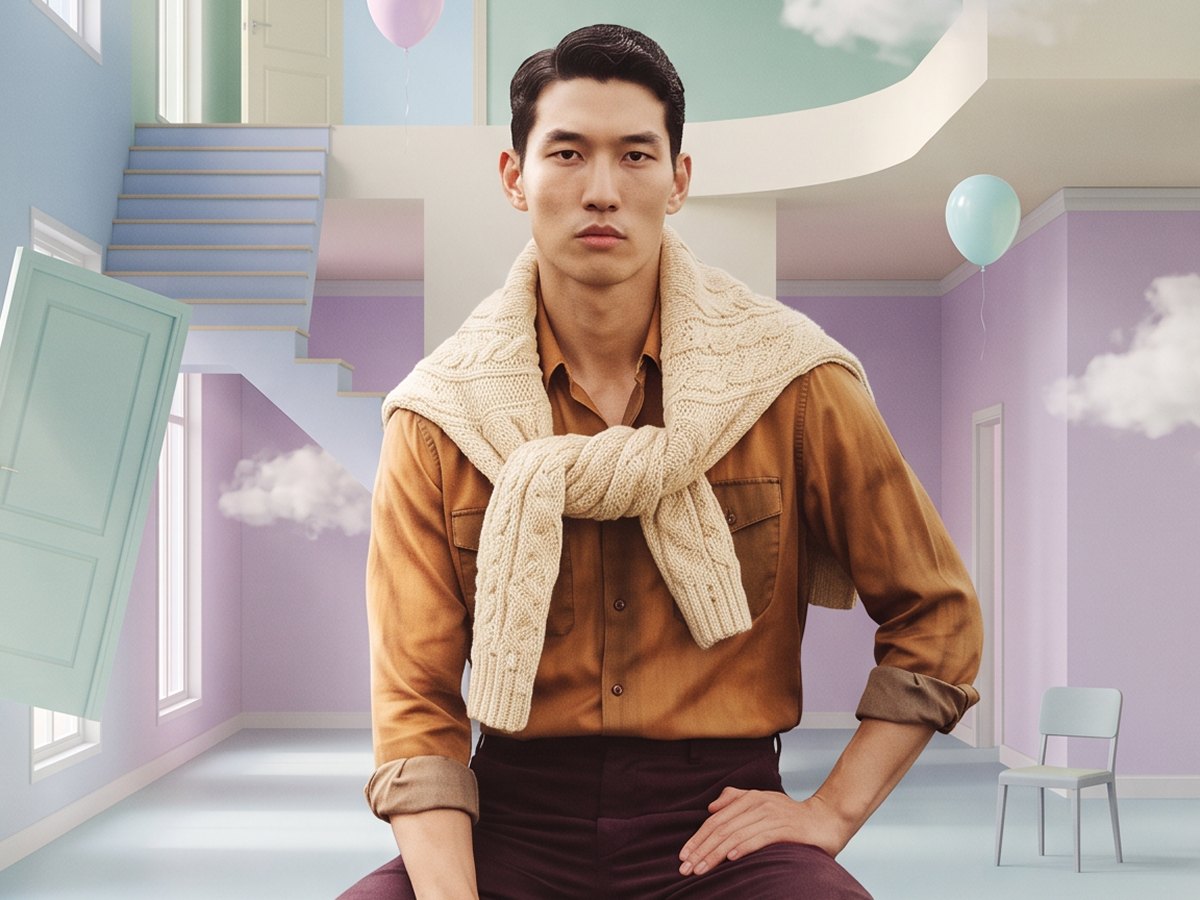
Dreamcore works through familiarity made slightly wrong. A normal person or object can stay completely believable while the space around it shifts into soft pastel architecture, empty rooms, strange scale changes or details that feel remembered rather than observed. It is most effective when the surrealism stays quiet enough that the viewer recognizes the scene before noticing why it feels impossible.
Transform @Image1 into an authentic Dreamcore editorial while preserving the person’s exact identity, facial features, hairstyle, expression, clothing, pose, and camera framing. Keep the subject fully photorealistic with realistic skin texture, natural facial detail, and believable lighting.

Reimagine the scene as a surreal Dreamcore environment inspired by liminal architecture and nostalgic childhood spaces. Create a quiet, emotionally ambiguous atmosphere that feels peaceful, familiar, and subtly impossible.

Place the subject inside an endless pastel architectural setting with soft blue walls, cream details, oversized windows, floating staircases, distant corridors, impossible room layouts, and clean geometric interiors that feel infinite. Add subtle surreal elements such as floating clouds indoors, suspended furniture, empty frames, drifting balloons, isolated chairs, impossible doorways, open ceilings revealing bright sky, and other gravity-defying architectural details.

Keep the composition as symmetrical as possible with balanced architecture, centered framing, and generous negative space to emphasize silence and isolation.

Use a restrained pastel palette of powder blue, cream, pale yellow, soft mint, lavender, and warm white. Avoid saturated color. Light the scene with soft diffused daylight from large windows, creating gentle bloom, delicate haze, subtle volumetric light, and soft realistic shadows.

Add slight dreamlike optical qualities such as gentle bloom, soft-focus falloff, faint chromatic aberration, delicate film grain, light lens diffusion, and atmospheric depth while maintaining premium photographic realism. Keep surfaces clean, smooth, and minimal, with believable architectural materials despite the impossible spatial logic.

The final result should feel like a premium Dreamcore fashion editorial: ultra-photorealistic, pastel, cinematic, nostalgic, peaceful, and quietly surreal, never dark, horror-inspired, or unsettling.
CCTV
 [Before][After]
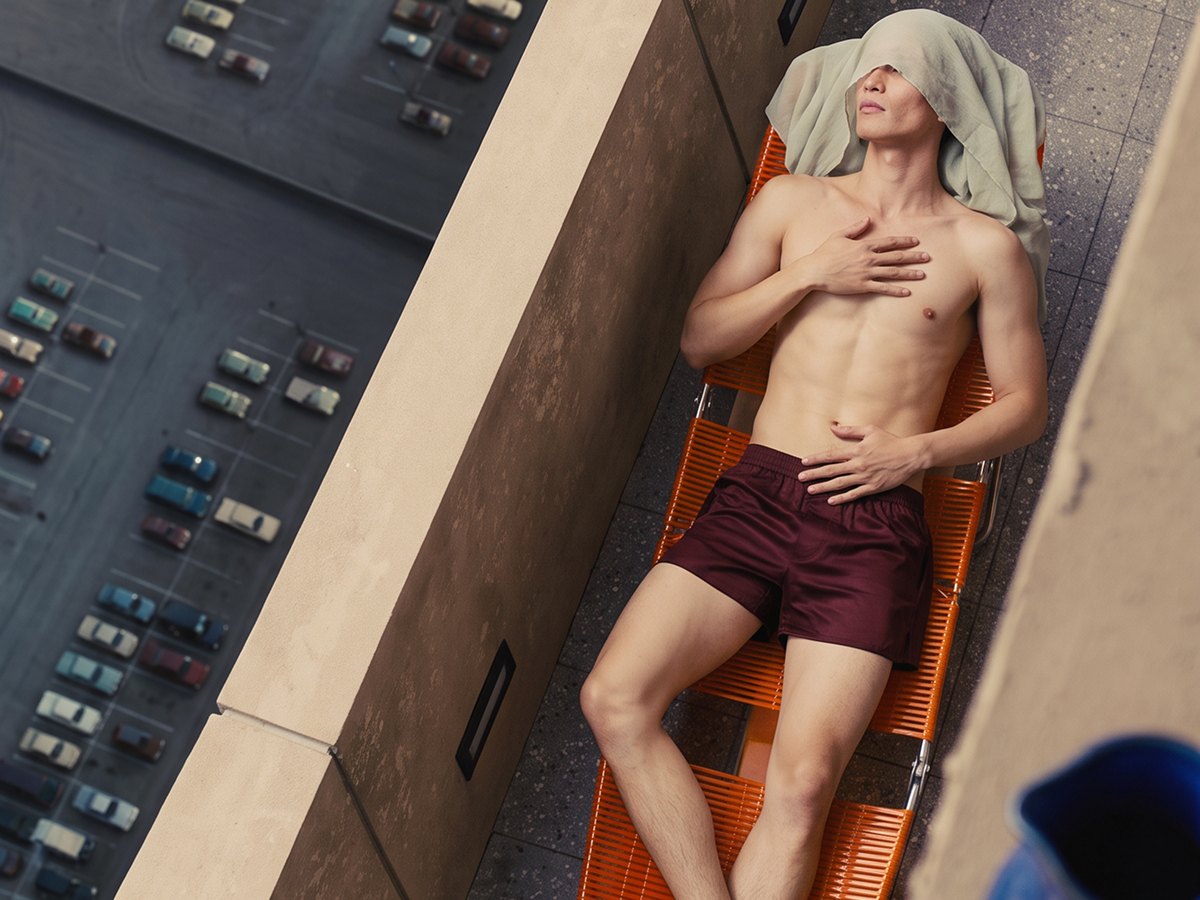
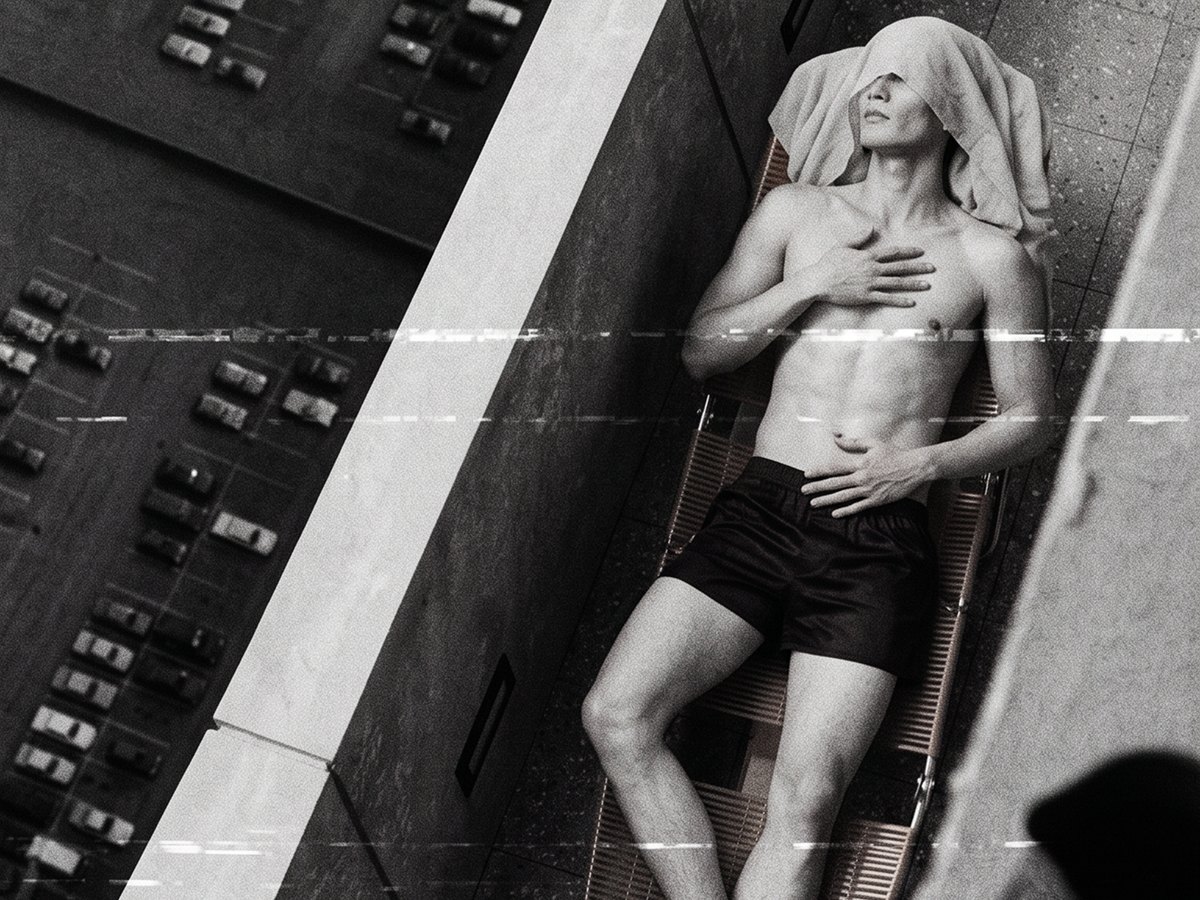
CCTV should feel like the image passed through a surveillance system rather than through a black-and-white filter. Resolution drops, static and compression begin to interfere with detail, the lens can warp near the edges, and timestamps or recording markers establish the source of the image. The degradation matters because a perfectly clean photograph with a timer in the corner still reads as a photograph.
Restyle @Image1 as authentic low-quality commercial CCTV footage while preserving the original image exactly: same subject, identity, face, pose, clothing, body proportions, background, objects, framing, crop, camera angle, perspective, and composition. Do not generate a new location, reposition the subject, zoom, crop, extend, or add anything to the scene.

Change only the imaging characteristics so the frame looks captured by a cheap fixed CCTV camera connected to an old low-bitrate DVR.

Convert the image to pure monochrome black and white with no color information. Use harsh surveillance-style grayscale with crushed blacks, clipped highlights, uneven tonal response, flat exposure, and inexpensive infrared-camera character.

Heavily degrade the image with obvious low-bitrate H.264 compression, macroblocking, mosquito noise, pixelation, edge ringing, electronic sensor noise, horizontal interference bands, scanline artifacts, frame ghosting, temporal smearing, signal dropouts, compression tearing, and DVR recording artifacts. Keep the subject recognizable, but make the low image quality immediately apparent.

Apply realistic cheap CCTV optics: fixed wide-angle lens, mild barrel distortion, subtle fisheye stretching near the edges, corner softness, slight perspective warp, and small-sensor flat focus from foreground to background.

Remove all cinematic qualities: no premium sharpness, HDR, shallow depth of field, bokeh, filmic contrast, editorial lighting, or polished color grading.

Add only minimal DVR metadata along the top edge: a small white digital timestamp, date, and simple camera label such as CAM 03 in basic monospaced surveillance text.

The final result should look like a paused frame exported directly from an inexpensive convenience-store, warehouse, or apartment security DVR system, not a cinematic photograph with a CCTV overlay.

Do not change the background or scene. Do not add objects, tracking boxes, facial-recognition graphics, crosshairs, military HUDs, thermal imaging, night-vision color, VHS styling, glitch art, or decorative UI.
Cut Paper Illustration
 [Before][After]
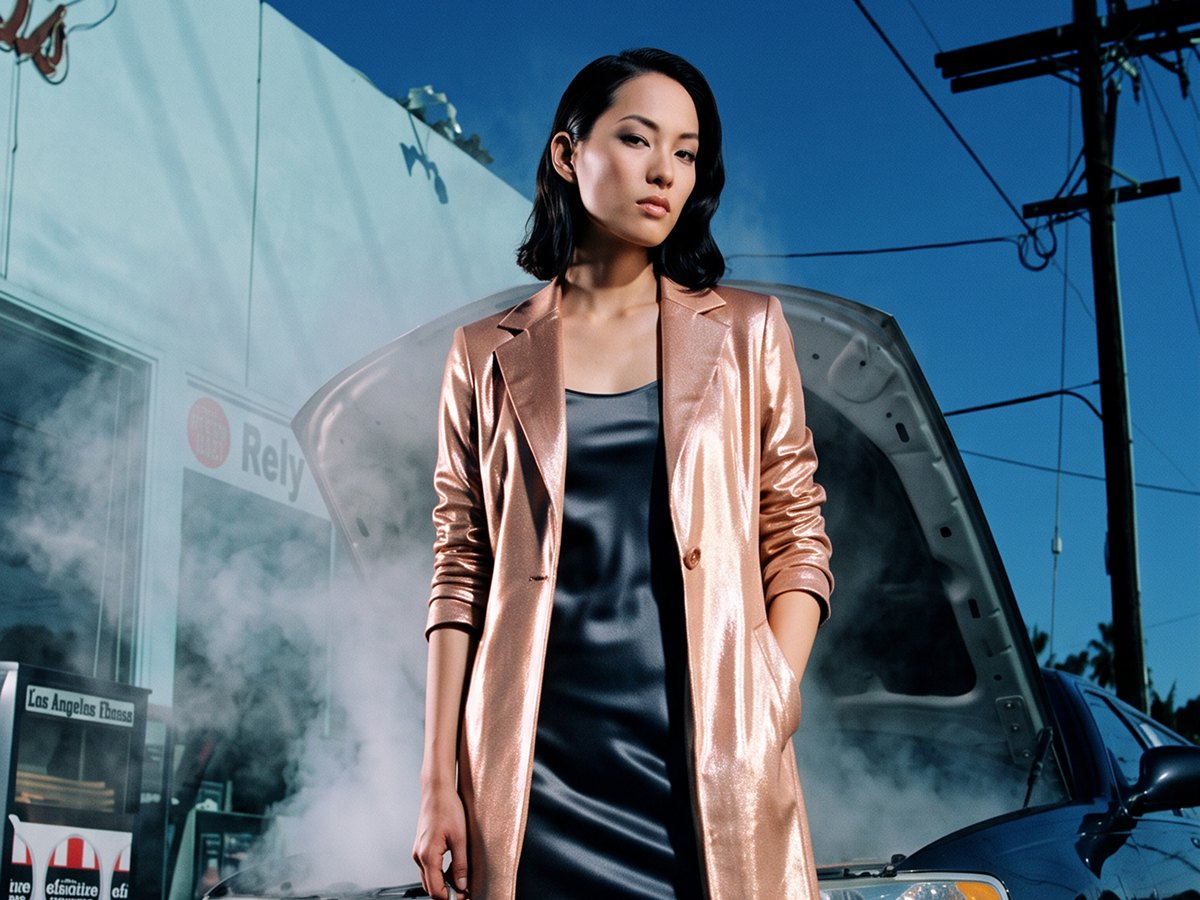
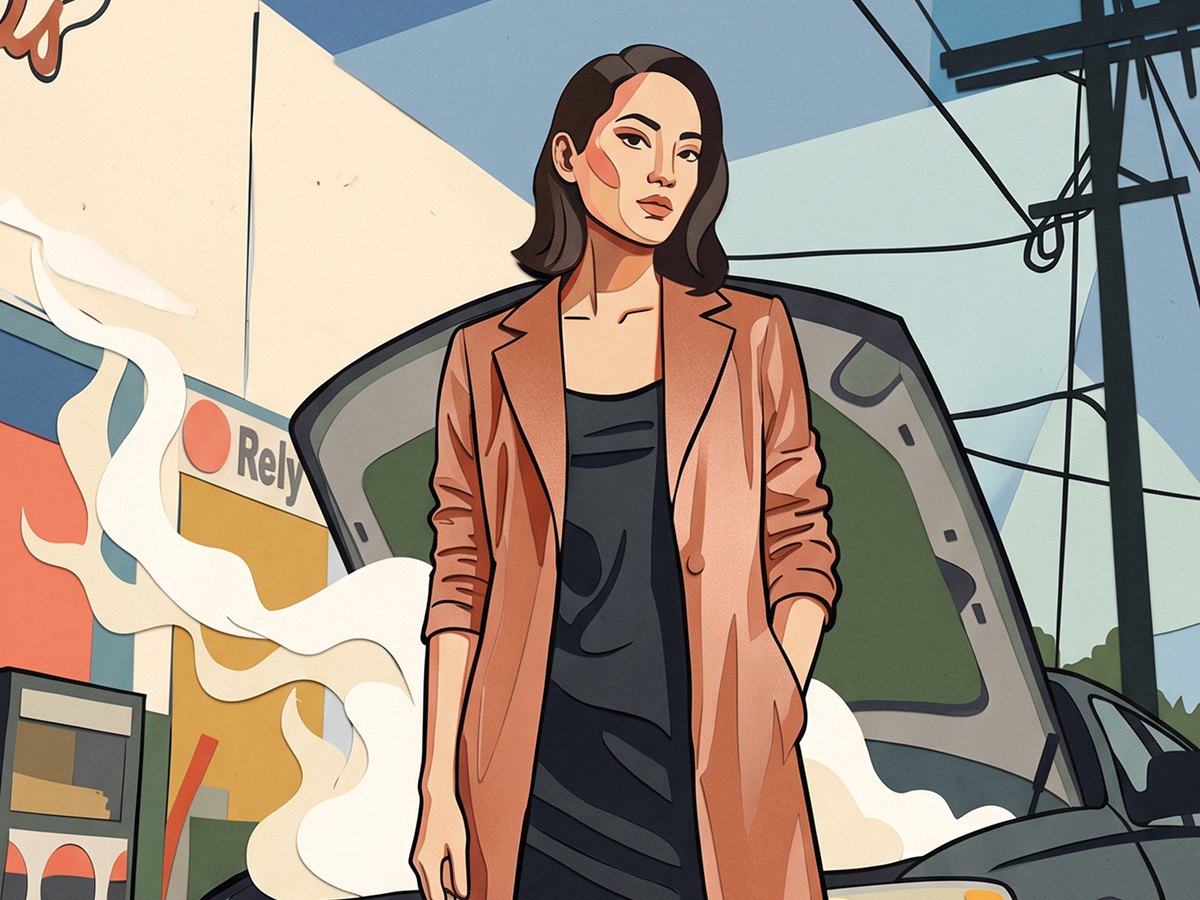
Cut Paper Illustration reduces the photograph into shapes. Skin, clothing, cars, buildings and shadows stop behaving like continuous photographic surfaces and become flat pieces with hard contours, simplified colour and visible layering. The style works when those pieces still describe the exact pose and perspective of the original instead of turning the image into a generic illustration of the same subject.
Transform @Image1 into an authentic Cut Paper Illustration while preserving the person’s exact identity, facial features, hairstyle, expression, pose, body proportions, clothing silhouette, background composition, and camera framing.

Reconstruct the entire image from layered hand-cut colored paper shapes. Translate the subject, clothing, objects, and environment into large overlapping flat cut-outs with clean organic silhouettes, simplified geometric forms, and carefully designed positive and negative space. Remove photographic detail while keeping the subject instantly recognizable.

Use completely flat color with no gradients, airbrushing, or realistic shading. Build depth only through overlapping layers, color separation, simplified shadow shapes, and subtle physical paper thickness.

Use a refined editorial palette inspired by contemporary and mid-century illustration: warm cream, terracotta, mustard, coral, burnt orange, olive, forest green, teal, dusty blue, lavender, charcoal, and deep black, with only occasional accent colors. Keep the palette limited and harmonious.

Add subtle handcrafted material qualities such as slightly irregular cut edges, faint paper fibers, tiny imperfections, layered thickness, and soft contact shadows where paper pieces overlap. The artwork should feel physically assembled by hand rather than digitally vectorized.

Use bold black contour lines selectively, with natural variation in thickness, to define important facial features, hands, clothing folds, and structural details without over-outlining the image.

Rebuild the background from large abstract paper shapes while preserving the original scene layout, perspective, and composition. Use flowing organic forms, geometric layering, balanced negative space, and strong editorial hierarchy.

The final result should feel like a sophisticated contemporary magazine illustration or gallery-quality paper collage, not a children’s craft image.

Avoid gradients, digital painting, watercolor, photorealistic rendering, pencil texture, halftones, manga, anime, excessive surface texture, or cartoon exaggeration.
Ink Wash
 [Before][After]
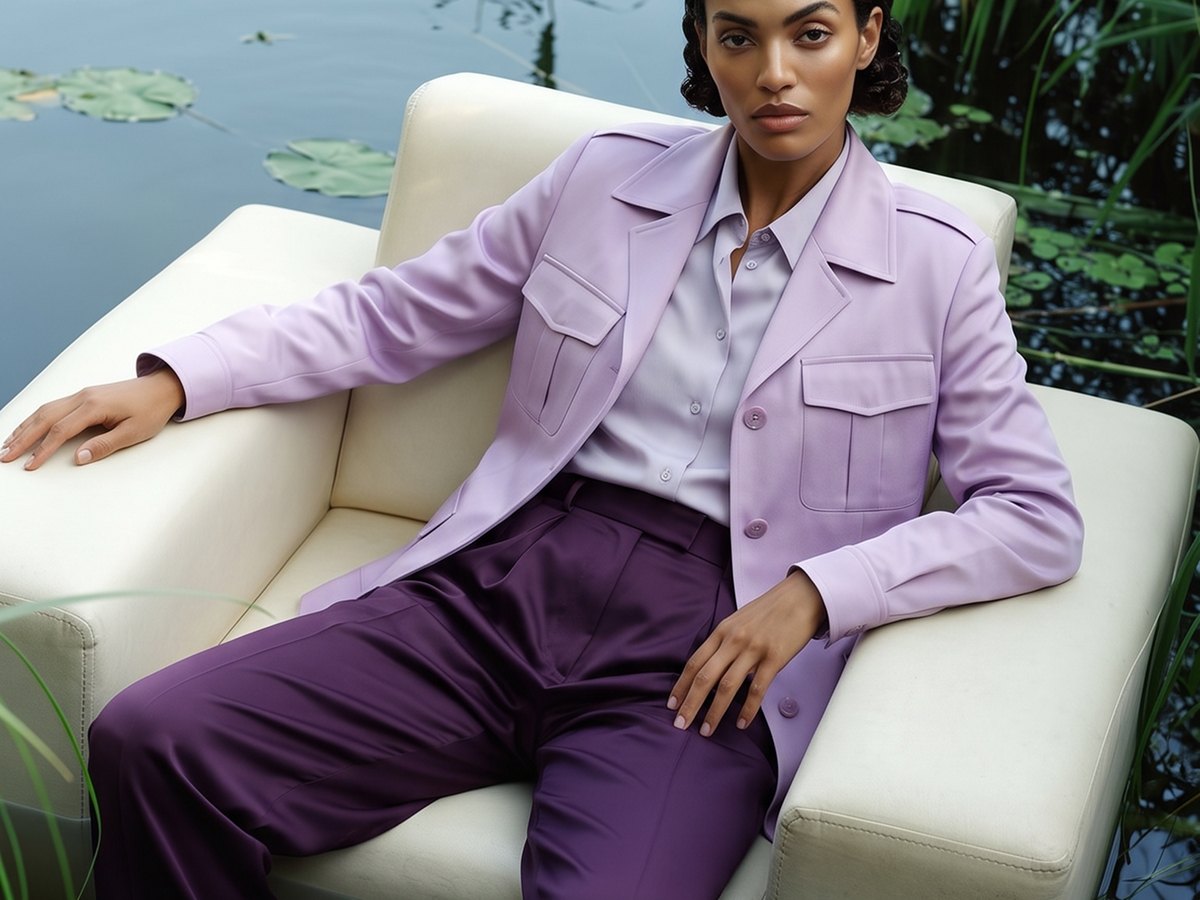
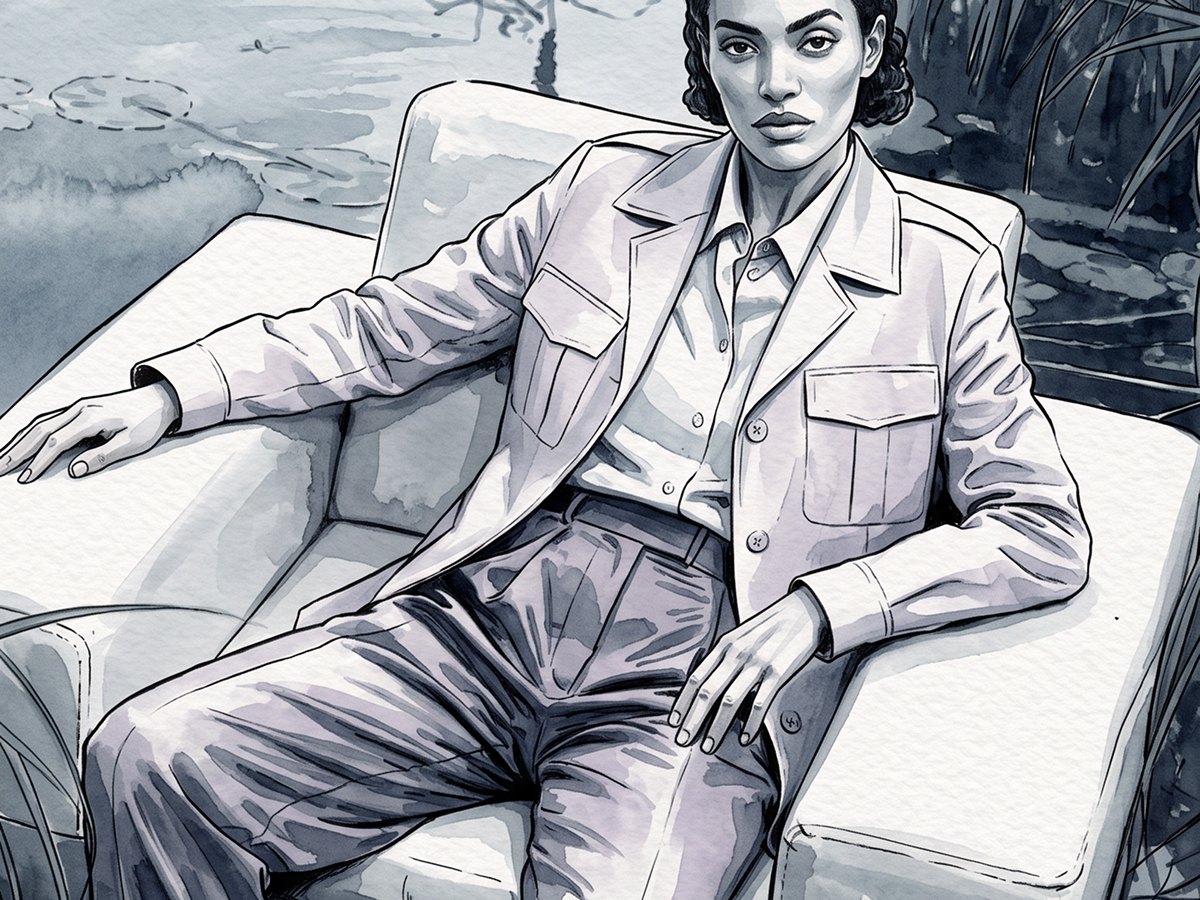
Ink Wash removes more information than most of the other effects here. Colour collapses, edges loosen, tonal areas bleed into one another and empty paper becomes part of the image rather than something that needs to be filled. The source still matters, but the transformation works best when it keeps only the details needed to hold the figure, pose and environment together and lets the rest dissolve into the medium.
Transform @Image1 into an authentic Novel Ink Wash illustration. Preserve the person’s exact identity, facial structure, hairstyle, expression, clothing, pose, body proportions, background composition, and camera framing.

Reinterpret the image as a premium hand-illustrated graphic novel artwork using expressive black ink linework and delicate ink wash painting. Keep the original composition intact while translating the image into elegant traditional illustration.

Use clean confident contour lines with natural variation in line weight, combining bold silhouette strokes with finer interior detail. Keep facial features highly recognizable through expressive ink drawing rather than photorealistic rendering.

Replace photographic shading with layered ink washes in a cold monochromatic palette of blue-gray, slate, charcoal, and soft desaturated gray. Build shadows with transparent brush washes, soft watercolor gradients, and restrained cel-like shadow shapes, creating depth without excessive rendering.

Include authentic traditional media characteristics: watercolor blooms, pigment pooling, feathered ink edges, paper absorption, dry-brush texture, subtle brush streaks, soft wash transitions, and natural ink diffusion. Keep the finish clean, refined, and premium.

Render clothing, architecture, and background elements with controlled graphic novel linework, simplified forms, and subtle ink texture. Avoid heavy crosshatching; rely mainly on elegant line art and fluid wash work. Let the white of the paper act as highlights.

Add a subtle cold-press watercolor paper texture beneath the illustration without overpowering the image. Keep the result cinematic, sophisticated, and museum-quality.

Avoid manga screentones, anime styling, halftone dots, heavy cel shading, cartoon exaggeration, painterly oil textures, digital painting artifacts, or distorted proportions. The final result should feel like a premium editorial graphic novel illustration: hand-painted, expressive, monochromatic, and beautifully traditional.
What keeps the set together
The subject should survive every transformation. That does not mean every pore, fabric thread or background detail has to remain visible, because some of these styles only work by throwing information away. What should remain stable is the underlying picture: identity, pose, framing, scale and the major shapes that make the source recognizable.
The effect then gets one clear job. Acid Graphics changes the graphic layer. Thermal Imaging changes the colour logic. X-Ray changes opacity and internal structure. Vaporwave and Dreamcore rebuild the world. CCTV changes the imaging system. Cut Paper and Ink Wash change the medium itself. Keeping that distinction clear is what stops eight very different styles from turning into eight unrelated images.


